Saturday, 25 August 2012

Rosewater Stained Glass Jelly

A friend of mine showed me a post that the very clever people at The Food Librarian had on Broken Glass Jello. It is basically coloured jelly cut up and suspended in technicolor gorgeousness in white jelly. Very very simple, very very beautiful and definitely a hit with the kids. The original recipe is super easy as the technicolor jelly was just 4 packets of Jello in 4 different colours.

I did opt not to use the boxed Jello purely for the fact that if I made my own coloured jelly than the colouring and sugar content was in my control. The white jelly component is sugar laden enough as it's a whole can of condensed milk. I also wanted the coloured component to be rosewater flavoured as rosewater jelly is something that always makes me think of my childhood.

Whichever way you decide to go just know that the kids won't care as all they see is colour, colour and more colour and as quickly as you blink the pieces will disappear.

Stained Glass Jelly

1.2L water
6-10 tablespoons castor sugar (go with your taste buds)
2 teaspoons rosewater
4 tablespoons powder gelatin
300ml boiling water
food colouring (I used 4 colours but it's up to you how little or how many you want)

*** or completely ignore the last 6 lines and get 4 boxes of Jello ***

395ml sweetened condensed milk
1/2 cup cold water
1 1/2 cup boiling water
3 tablespoons gelatin power

1. Make jelly. If you are using Jello only use 1 cup water for each colour as you want the jelly a harder consistency and it sets faster. If not add water, sugar and rosewater to desired taste and let simmer. In a separate cup dissolve gelatin in hot water and stir through jelly mixture. Boil once and remove from fire.

2. Separate jelly into 4 containers and add food colouring. Cool in fridge. If possible overnight is preferred but if not as long as possible, 3 hours or more.

3. Once coloured jelly is ready cut into little blocks and mix it up in a container.

4. Dilute condensed milk with hot water. Dissolve gelatin in cold water and mix. Stir and let cool before adding to coloured jelly. If you add when milk jelly is still hot coloured jelly will start to melt. Set in fridge overnight.


Friday, 17 August 2012

Maltesers Fudge Slice

A few months ago I was given a recipe for a low fat low sugar low cal Weight Watcher's dessert recipe with one of my all time favourite chocolate, Maltesers. It has taken me this long to try it because I honestly thought that the low sugar and low fat would bring along with it low taste. I am so so pleased to say that I was wrong on that assumption. This recipe made a dessert that is tasty and moist and sticky and fudgey and just Malteserey goodness all the way through.

This recipe has no butter at all, very little vegetable oil and it uses vanilla fruche so it's a win win from the word go. 

**** this original recipe only calls for 120g of Maltesers but I must admit that I bought a jumbo pack, added about 200g in the cake, kept 24 balls aside for decorations and ate the rest ... hehehhehehe****

Maltesers Fudge Slice

1 cup self raising flour
3/4 cup cocoa powder
approx 200g Maltesers
2 eggs
3/4 castor sugar
2 tbs vegetable oil
2 x 150g tubs lite french vanilla Fruche
1/3 cup skim milk
vanilla frosting for decoration is optional (I used store bought)

1. Preheat oven to 180 degrees.
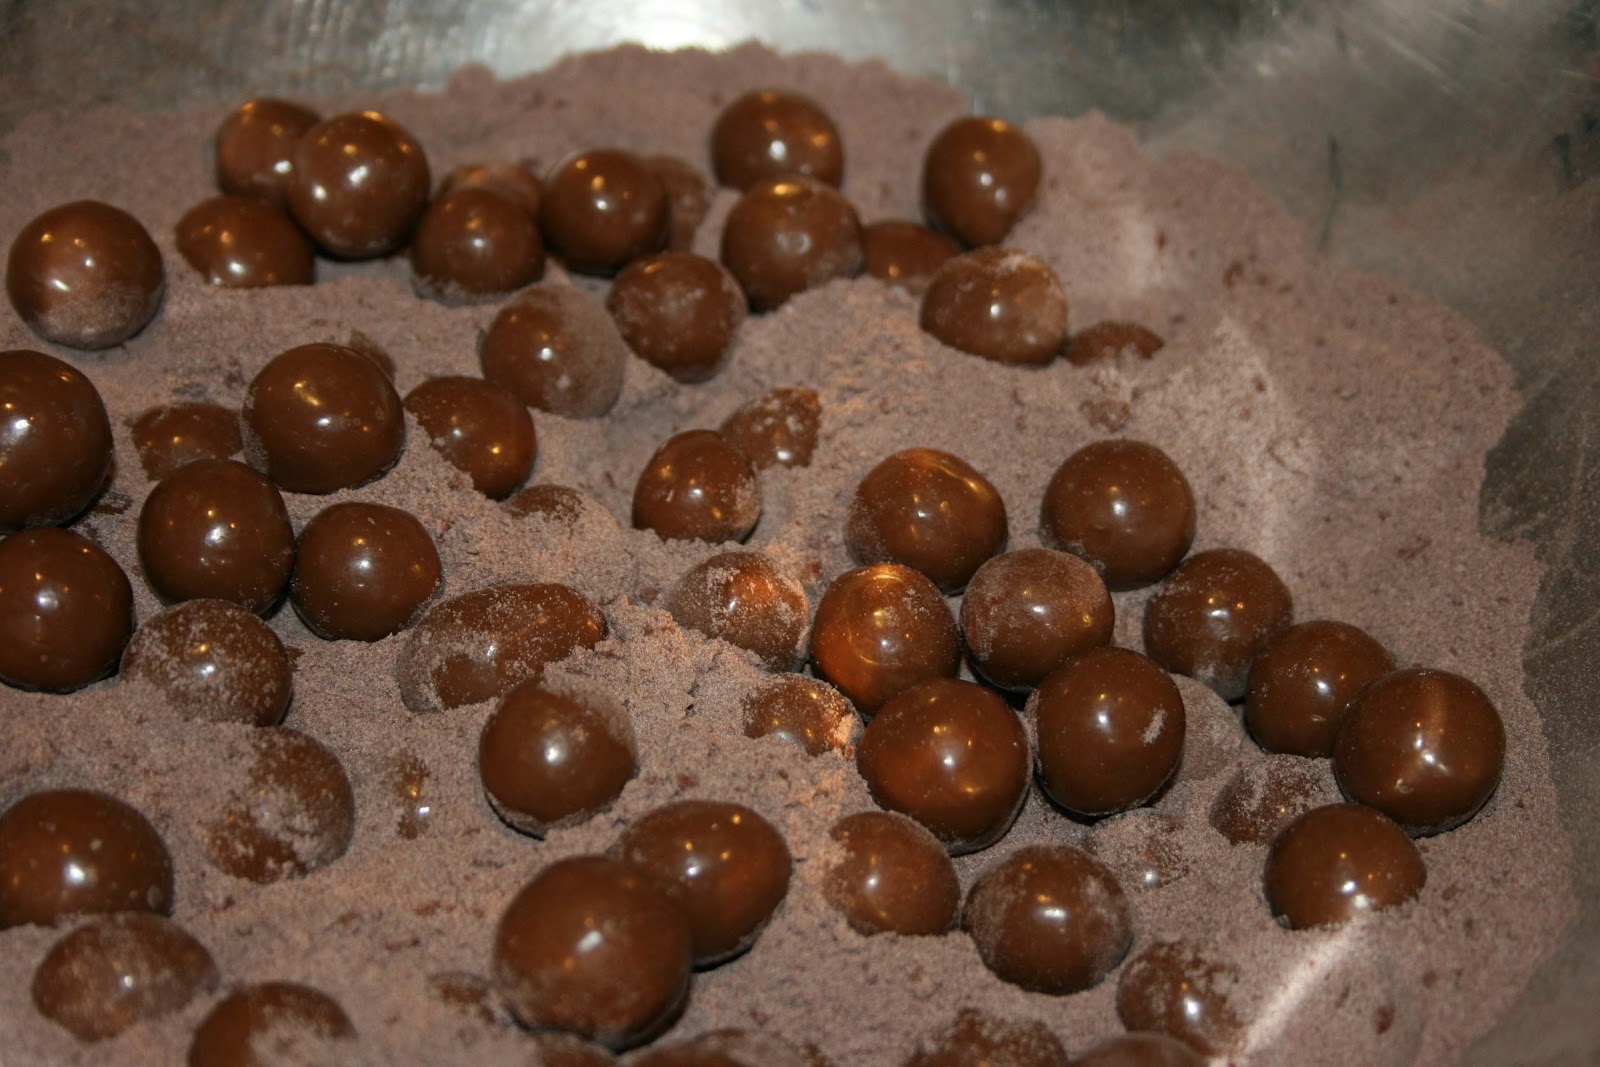
2. In a big bowl mix flour, cocoa powder and Maltesers
3. Use another bowl and whisk all remaining ingredients. Then add to dry ingredients and mix well.
4. Place batter into a tin and smooth the top down. I used a silicone tray but if you don't make sure you line bottom and sides with baking powder.
5. Bake for 30 minutes until firm.
6. Allow to completely cool before cutting.
7. Add a little vanilla frosting if you wish. It doesn't really need it but I could not help myself!


Saturday, 4 August 2012

Strawberry Custard Tarts

It was twin playgroup time again and I was tossing up between making either this or cookie pops. After a rather hectic week and not really wanting to load the twins into the car and drag them (or rather them drag me) through the shops for 1 item I made these tarts. Always fun to make and certainly a winner among the kids. They just love anything with strawberry in it. Also the price of strawberries are coming back down again so I had several punnets just looking fat and sweet calling at me "eat me, eat me". You only have to tell me once.

The recipe that I used is from Taste.com.au with a little tweak. I doubled the custard ingredients as the original recipe only made enough custard for 12 mini store bought pastry cases and I wanted more. Also I made my own tart cases. I did not make the pastry from scratch but by all means if you can please do. I used ready made shortcrust pastry and also some dark chocolate shortcrust pastry. Here's a thing I learnt from using the chocolate pastry - taste SO crazily yummy as is without baking. All the remnants from the cut outs ... ate them :)

Strawberry Custard Tarts
3 sheets shortcrust pastry (I used 2 normal, 1 chocolate just because I could)
4 egg yolks
4 tablespoons caster sugar
2/3 cups thickened cream
strawberry jam
1 punnet strawberries

1. Preheat oven to 180 degrees.
2. Cut out pastry and shape into muffin trays. I made 24 minis and 6 large muffin size ones.
3. Dock the pastry by piercing it with a fork several times so that it doesn't rise and get too puffy or you won't have room for lots of custard.
4. Bake in oven for 10 minutes, set aside to cool and start on custard.
*** pastry will shrink a little when baked so when you cut out pastry to make tart cases do not cut out pieces that are too small ***
5. Whisk yolks and sugar until all sugar is dissolved. Then add cream and mix. Don't whisk too much or the final product will be bubbly and not smooth.
6. Put a small dollop of jam on the base of each tart and add a piece of strawberry. How big the piece of fruit is up to you and also it has to fit the size of tart.
7. Pour custard into tart case around the strawberry and try not to overfill.
8. Bake for approx 15 minutes until custard is set.


Thursday, 26 July 2012

Lemon Curd Cream Filled Strawberries

I wanted to make dessert for my husband today as we celebrated our wedding anniversary. Problem is he is not that keen on sweets - crazy I know! On the rare occasion that he does have any dessert he would always lean towards something with a tang. So after thinking about what to make and realising I really did not have a lot spare time to make it with I decided to steal the idea from another recipe I have. There is a summer berry tart that I make called Creamy Lemony Summer Tart that is quick and easy and it's fruity and tangy so it made sense that I'd use the filling from that tart for our dessert tonight.

Dessert tonight was quite simple strawberries filled with a tangy lemon curd cream. Hardly any time needed and very little cooking. Here's how to make it.

20 strawberries
4-5 tablespoons cream cheese (softened)
2-3 tablespoons lemon curd (I use store bought)
1/3 cup sugar
4 tablespoons water

1. To core the strawberries simple use a sharp knife and cut a cone shape out from the centre. The more you take out the more you can fill so do take out as much as possible.
*Be careful not to go too deep and make a hole at the bottom*
**I use an egg carton to hold the strawberries in for ease when filling**
*** don't waste the core, it's delicious!!***


2. Mix lemon curd and cream cheese. You want a nice thick consistency.
*if filling is too runny add more cream cheese or too thick ad more lemon curd*

store bought is fine


3. In a small saucepan make toffee by boiling sugar and water. Once the bubbling sugar changes colour to a lovely golden brown turn fire off.

4. Use a spoon and drizzle toffee on baking paper. You want to make a random pattern of webbing or netting. Have some thin strains and some big thick drops so that you have some crunchy bits and some lovely big chunks. Make it random and it looks quite pretty.

5. When toffee cools remove from paper and simple break shards for garnish.


6. Fill strawberries with lemon curd filling. Garnish with toffee shards.

7. Try to stop eating all of it by yourself!!


Friday, 20 July 2012

Coconut and Almond Tart


One of my all time favourite tart in the world is this Coconut and Almond Tart. The tart is based on a Dutch recipe of a coconut cake called Klappertaart. Like all old amazing recipes the world over many people have their own version and this is mine. I must admit that I got inspired by looking at a recipe from a South African site but the name eludes me at the moment. I will give it credit when I come across it again.


You can make one large tart or lots of little bite size ones. If you love coconut like I do, this is a must try. The short pastry with that salty buttery goodness, followed by the amazing texture filled coconut filling countered with a little tang from the jam .... mmmmmmmmmm!

Coconut and Almond Tart
Filling
2 cups desiccated coconut
1 cup sugar
2 Tablespoons butter
1 cup water
2 eggs (separated) 
1 teaspoon vanilla essence
1/2 teaspoon almond essence
2 or 3 (or more if you really like almonds) handfuls of slithered or sliced almonds
approx 3 tablespoon jam (anything that's not too sweet)
pinch of salt
Crust
1 cup plain flour
125g butter (cubed)
1 egg yolk (lightly beaten)
pinch of salt
cold water


1. Preheat oven to 180 degrees. Grease a loose bottom pie dish or individual moulds if you're making bite size ones.
2. Put coconut, sugar, water, butter and salt for in a saucepan and simmer for 10-15 minutes.
3. While the coconut mix is simmering start making the pastry. In a large mixing bowl put flour and salt and then with your fingertips rub in butter. Once the mixture starts looking like breadcrumbs add the beaten yolk and some ice water. Add the water a tablespoon at a time. Knead the dough until it comes together in a ball. Press dough on to the pie dish or individual moulds. Spread the jam over the crust.
4. Whip 2 egg whites until it reaches stiff peaks.
5. Add egg yolks, sliced almonds and vanilla and almond essences into coconut mixture.
6. Fold in egg whites and spoon mixture into crust.
7. Place on bottom shelf of oven for approx 40 minutes until a golden crust is formed and coconut mix is set.

I didn't use a loose bottom dish -
when I should have really

Tuesday, 10 July 2012

Coconut Sugar Jelly

When my Mum visits from Malaysia I take full advantage of her amazing cooking skills and set her to work for my belly and my cravings for the duration of her stay. I suddenly go from Goddess of My Kitchen (it's my blog and I can call myself anything I wish) to a kid needing Mum's cooking and she never disappoints. Mummy's are amazing aren't they?

Tonight after a banquet for dinner which was followed by a luscious dessert I thought out loud "Mum, remember that coconut jelly you used to make" and without skipping a beat Mum starts on this delicious jelly - after we had all had pavlova mind you!! 

Now my Mum's way of cooking is never precise, always a dash of this, a pinch of that, a splash or 2 of something else so I have had to try to learn with my eyes and by tasting so this recipe is a flurry of note taking and me trying to sum up some measures as my amazing Mum Goddess does her pinch of this and drop of that.

For lovers of hard jelly (it's not of the wobbly ilk) and of the taste of coconut this is a must try. I love coconut in any shape or form so now that I know how to make this it will be on my repertoire of things to whip up when I want a taste of Malaysia. Delish!!

Coconut Sugar Jelly

1 packet of 40g agar-agar
2 strips of pandan leaves
250g of coconut sugar (palm sugar, gula melaka)
400ml coconut cream
2 big pinches of salt
1.5l water

1. Dissolve agar-agar in a pot with 1.25l water. Knot the pandan leaves together and leave them in the pot with agar-agar.


2. When most of the agar-agar is dissolved add the palm sugar and over a gentle flame slowly stir until all sugar is dissolved as well. Add salt.


3. Mix the coconut cream and approx 250ml water and then add to agar-agar solution and taste.
*** If you feel you may like a sweeter jelly add a tablespoon or 2 of castor sugar to taste.


4. Stir until everything looks well mixed and then let boil. Take mixture off the fire as soon as it reaches boiling point. Sieve once and pour coconut mixture into whatever mould you want.

5. Leave to set on kitchen top or fridge. The jelly will set quite fast compared to the wobbly ones as the agar-agar works a lot faster than gelatine. Our efforts tonight was not placed in the fridge at all for setting.

6. Once set use knife and cut everyone a slice and then give yourself a big spoon and shovel jelly in face!! YUM!


Friday, 29 June 2012

Sugee Cake .. with a twist

Growing up in the Eurasian community in Penang, Malaysia meant loving the amazingly rich and delicious semolina cake called Sugee Cake. It's a cake that has many versions, every family has it's own secret recipe that they swore was of course the best in the world. One would get the chance to sample other people's sugee cake only at festive gatherings because that was a cake that was offered with pride from each family ... with the baker of the cake defiantly waiting for anyone to dare say they had tried a better version somewhere else.

Watching my Mum make the cake every year for Xmas was always so much fun. As a kid all the cake making process was to me was batter, bowls and beaters that needed a good licking. As I got older and learnt more about the sugee cake my Mum's version just seemed like such a chore as the semolina needed soaking for ages, the almonds were blanched and then skinned and then sliced and then roasted and so many other things seemed to need more than just beating and baking.

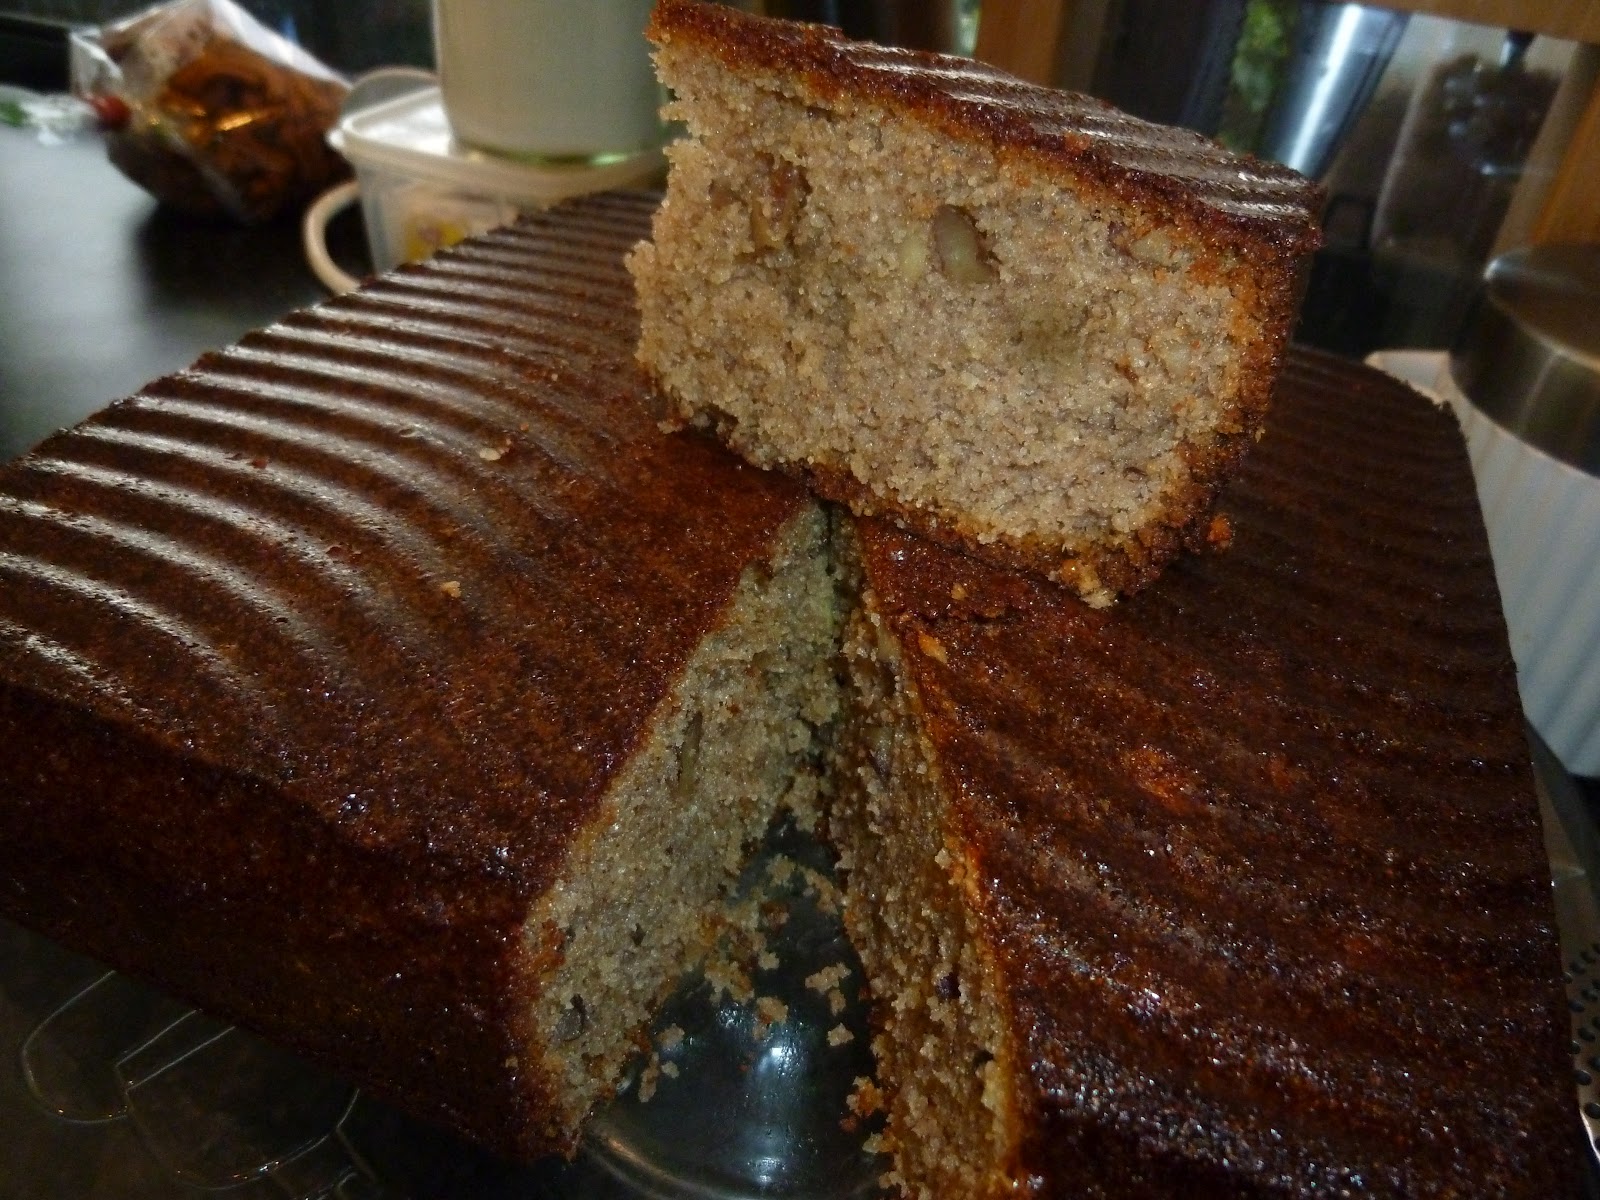
I found a recipe that looked simple and straight forward so I decided to try it. I called this cake a Sugee Cake "with a twist" because I had most of the ingredients needed, just not all of some so the twist is me improvising and hoping it works and then trying to make it sound non traditional on purpose because that's what I do .... the truth is it's a non traditional Sugee Cake because I did not have enough almonds and was too lazy to go to the shop and instead substituted with pecans. Lovely substitute but the darkness of the pecan made the cake that should have been very light and golden actually quite brown. My Mum also used a sweetened dry melon called "kundur" which I had none. Also I had no brandy which was such a shame as a  little brandy takes this cake to a different level.

Don't compare this to a traditional Sugee Cake, rather think of it as a Semolina Spiced Nut Cake. It can not compare to my Mum's Sugee Cake but it's still lovely so here's my non traditional Sugee cake With a Twist .. wink wink!!

250g butter
250g semolina
300g sugar
250g almonds and pecan roasted and ground very coarsely (or all almond, I did not have enough so I used pecan to make up the measure)
8 eggs
1 tablespoon honey
1 teaspoon vanilla essence
1/2 teaspoon rosewater
1 teaspoon baking powder
1/2 teaspoon cream of tartare
1 teaspoon mixed spice
2 tablespoons brandy

1. Preheat oven to 200 degrees.
2. Separate the eggs.
3. Cream butter and sugar until light and fluffy and pale in colour. Then beat in yolks one at a time.
4. Mix everything else in except egg whites and cream tartare.
5. Beat egg whites and cream of tartare into stiff peaks and fold into cake batter.
6. Put in oven and then drop temperature to 170 degrees and bake for 60 -75 minutes.

The crust on the cake should be dark and well caramelised and in my opinion the BEST part of the cake!!